Verification of your Facebook Business Manager account is required to gain full access to your WhatsApp Business API account.
You can access WhatsApp Business API even if your Facebook Business manager is not approved. But you will only have limited access to the WhatsApp API!
Therefore, to fully utilise WhatsApp Business API for your Business, it is advised that you apply for Facebook Business Verification.
But, before we go any further, let’s clear up a common misunderstanding that many people have.
“Facebook Business Verification” & “Facebook Page Verification” are two different things. ⬇️

In this blog, we will go through what Facebook Business verification is and how to verify your Facebook Business Manager step-by-step.
What is Facebook Business Verification?
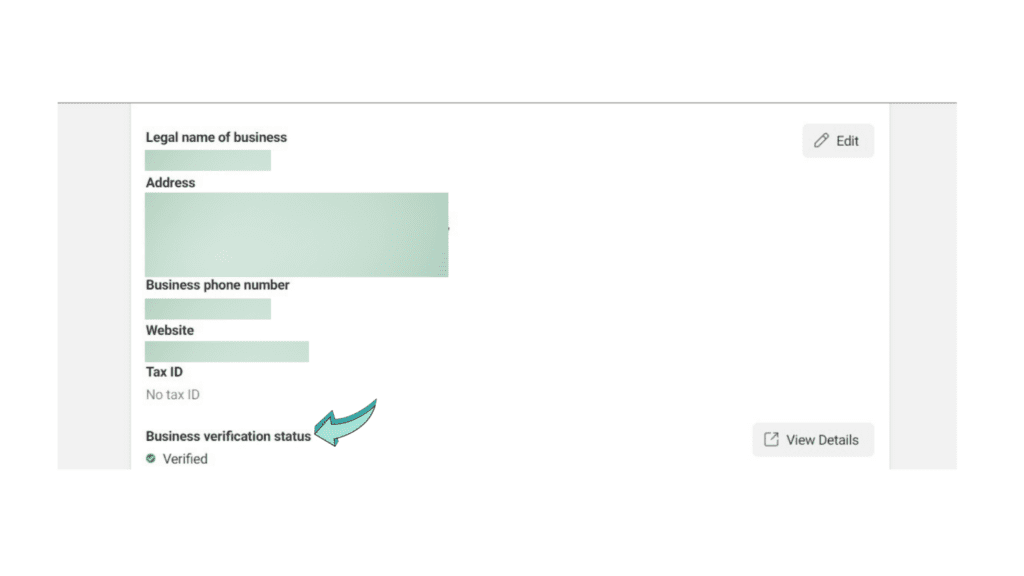
With the use of Facebook Business Manager Verification, Facebook can identify whether an account is associated with an actual business or firm.
Here are the legal documents you’ll need to get your Facebook Business Manager verified:
- Legal information about your business (business name, address, contact info)
- A legal document, preferably a GST or bank account statement, that contains the legal name of the business and its legal address
- An active website. The website’s footer must include the exact Legal Business Name (as cited in the documents).
- Evidence of business access, such as a legitimate business email (email with the same domain as your website).
***Please keep in mind that the image of your document must be clear, coloured, and display the entire document.
How to verify Facebook Business Manager?
Step 1: First, Go to Facebook Business Manager
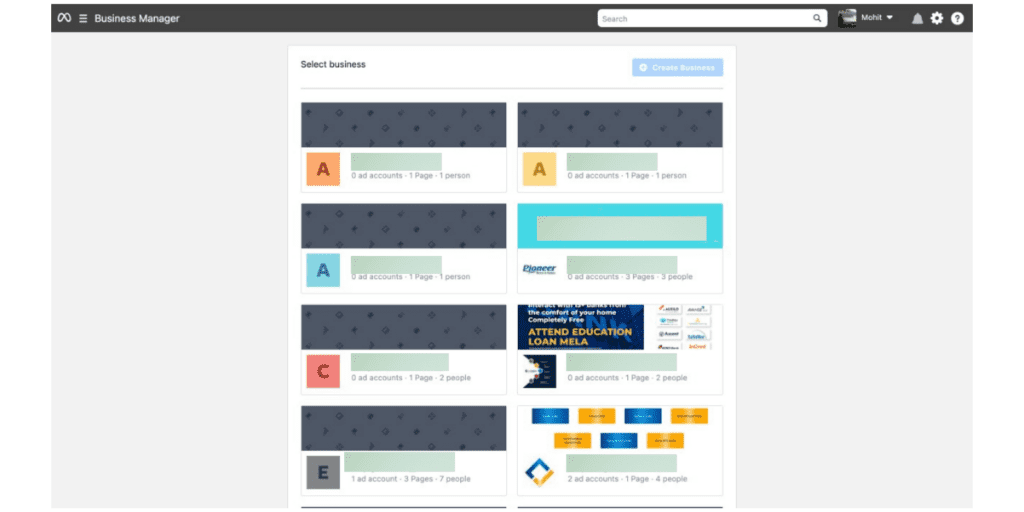
Step 2: Select a Facebook Business Manager account.
If you already have a business manager account, select the account from which you wish to obtain your WhatsApp Business API. If you do not have a Facebook Business Manager account, you can create one by clicking here.
Step 3: Proceed to the Security Centre.
On the left side, click on the Security Centre
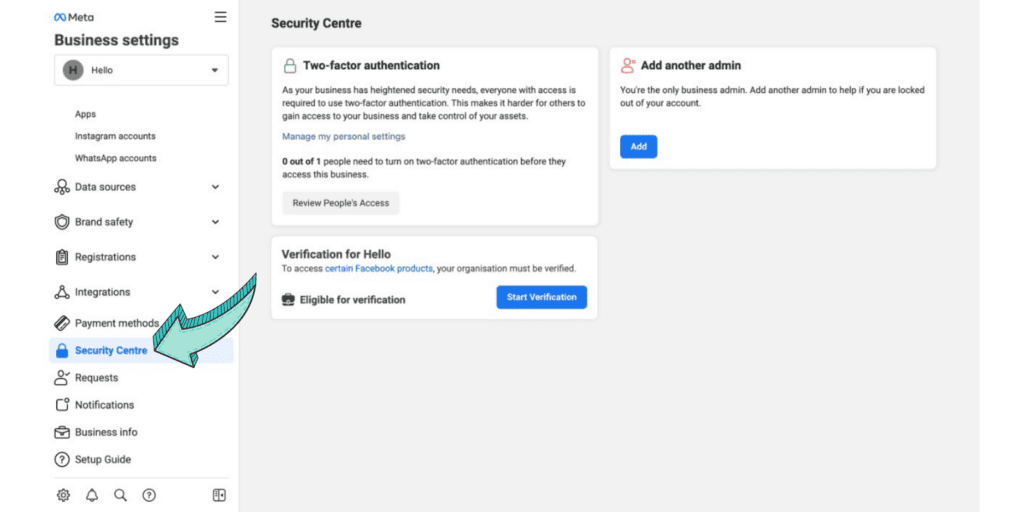
Step 4: Tap the “Start Verification” button.
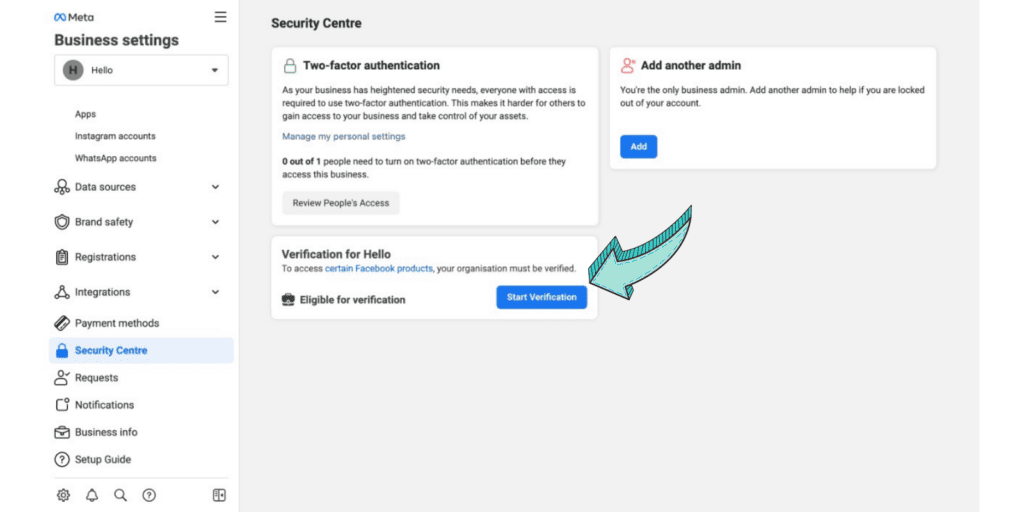
Step 5: Select “Get Started”
Click your Start Verification Button once you can see it, then select “Get started” on the following screen (as shown in the image below)

5.1 Choose country
In this step, choose the country where your business is primarily based.

Step 6: Enter Organization Information
Provide accurate information about your organisation!

Fill up the name field with the exact name that appears in your legal document.
Write the same address that is listed in your legal document in the address field. Adding a different one can interfere with Facebook’s approval of your request.
Make sure you simply enter the address of your business and not the state or pin code in the address row.
In the next row, enter the Town, State, and Pincode as indicated in the image above.
E.g. If your address is 1002,Ganesh Nagar, Goregaon, Mumbai, Maharashtra, 110006.
Then, only add ‘1002, Ganesh Nagar, Goregaon’ in the address row.
Add Mumbai, Maharashtra in City & State and 110006 in Pincode.
Your WhatsApp Business API number need not be entered in the phone number field. Any additional business phone number that you want to receive communications from Facebook can be added.
Lastly, include the website’s URL. In order for Facebook to confirm that this business is associated with the legal name, the website’s footer should provide the legal business name.
Step7: Select your business or click “Organization not listed.”
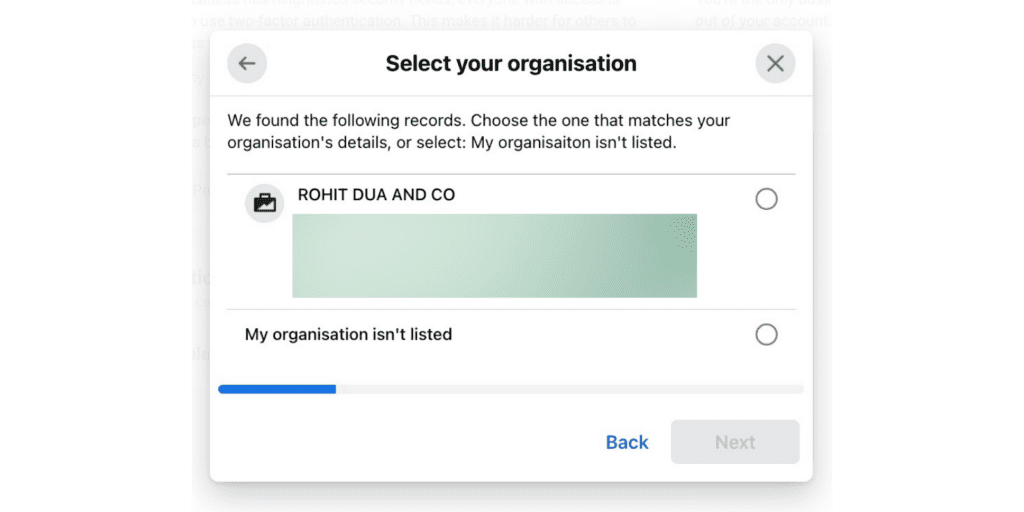
After you submit all of the information, Facebook verifies to see which companies match the data you provided. Select only those companies that exactly match the details of your organisation.
Additionally, you ought to have your company’s phone number on hand for verification.
Don’t worry if your company isn’t on the list. Click ‘Organization not listed’ to proceed to the next stage.
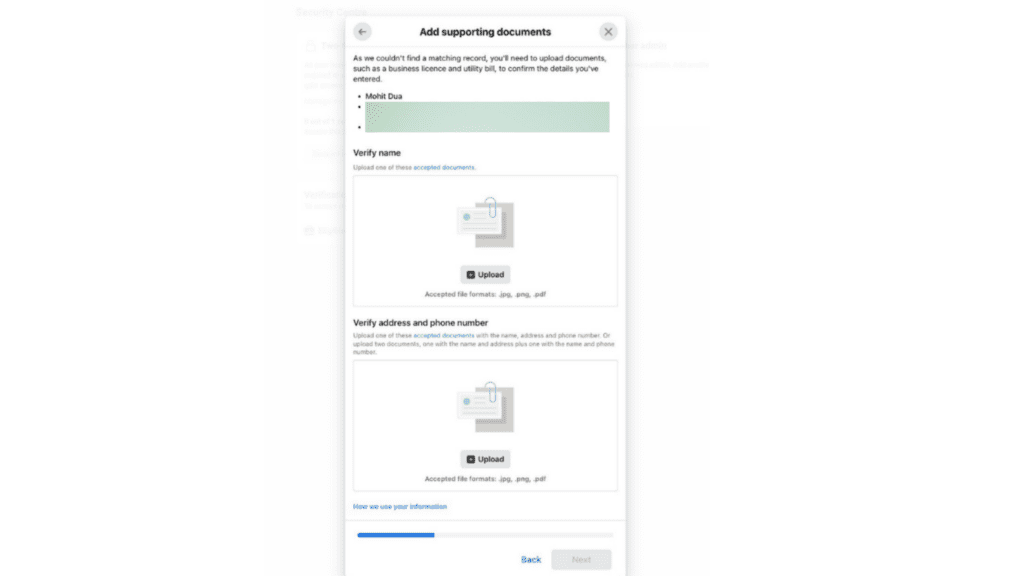
Step 8: Include supporting documentation for your business
If your business wasn’t identified in the step before, include supporting documentation to prove your identity. To avoid misunderstanding, be careful to upload the same document to both locations.
Step 9: Select a Method of Contact
Note: Email is the preferred method of contact because it increases your chances of being verified.
Add your legitimate business email address with the same domain (for example, Harry@botosynthesis.com) and click the next button.
If you don’t have an email address associated with your domain name, select phone or text for verification.
Step 10 Verify the Code
Verify the code sent to your Email ID or enter the OTP sent via text or phone.
Before you leave
Facebook Business Verification is required to gain full access to the WhatsApp Business API. So, get your Facebook Business Manager verified with 10 easy steps above and simultaneously apply for the WhatsApp Business API with Botosynthesis.