Knowledge Base
You can add/edit/delete a product which you need to sell by a chatbot. Follow these steps to add or modify or even delete the products.
If you had an online store you can connect Shopify or WooCommerce store with Botosynthesis platform in minutes. If you don’t, then you can add your product to the platform’s inventory.
Follow these steps to add or modify or even delete the products.
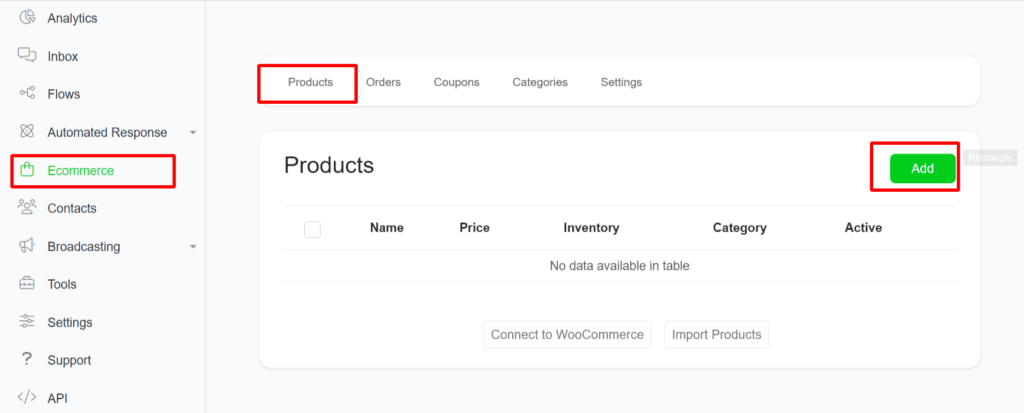
Select the Menu located on the top-left corner of the page and go to the eCommerce section.
You can find “Add Product” option on the right corner of the table content.

Select the add product button (as highlighted with a red box in the above image) to proceed further.

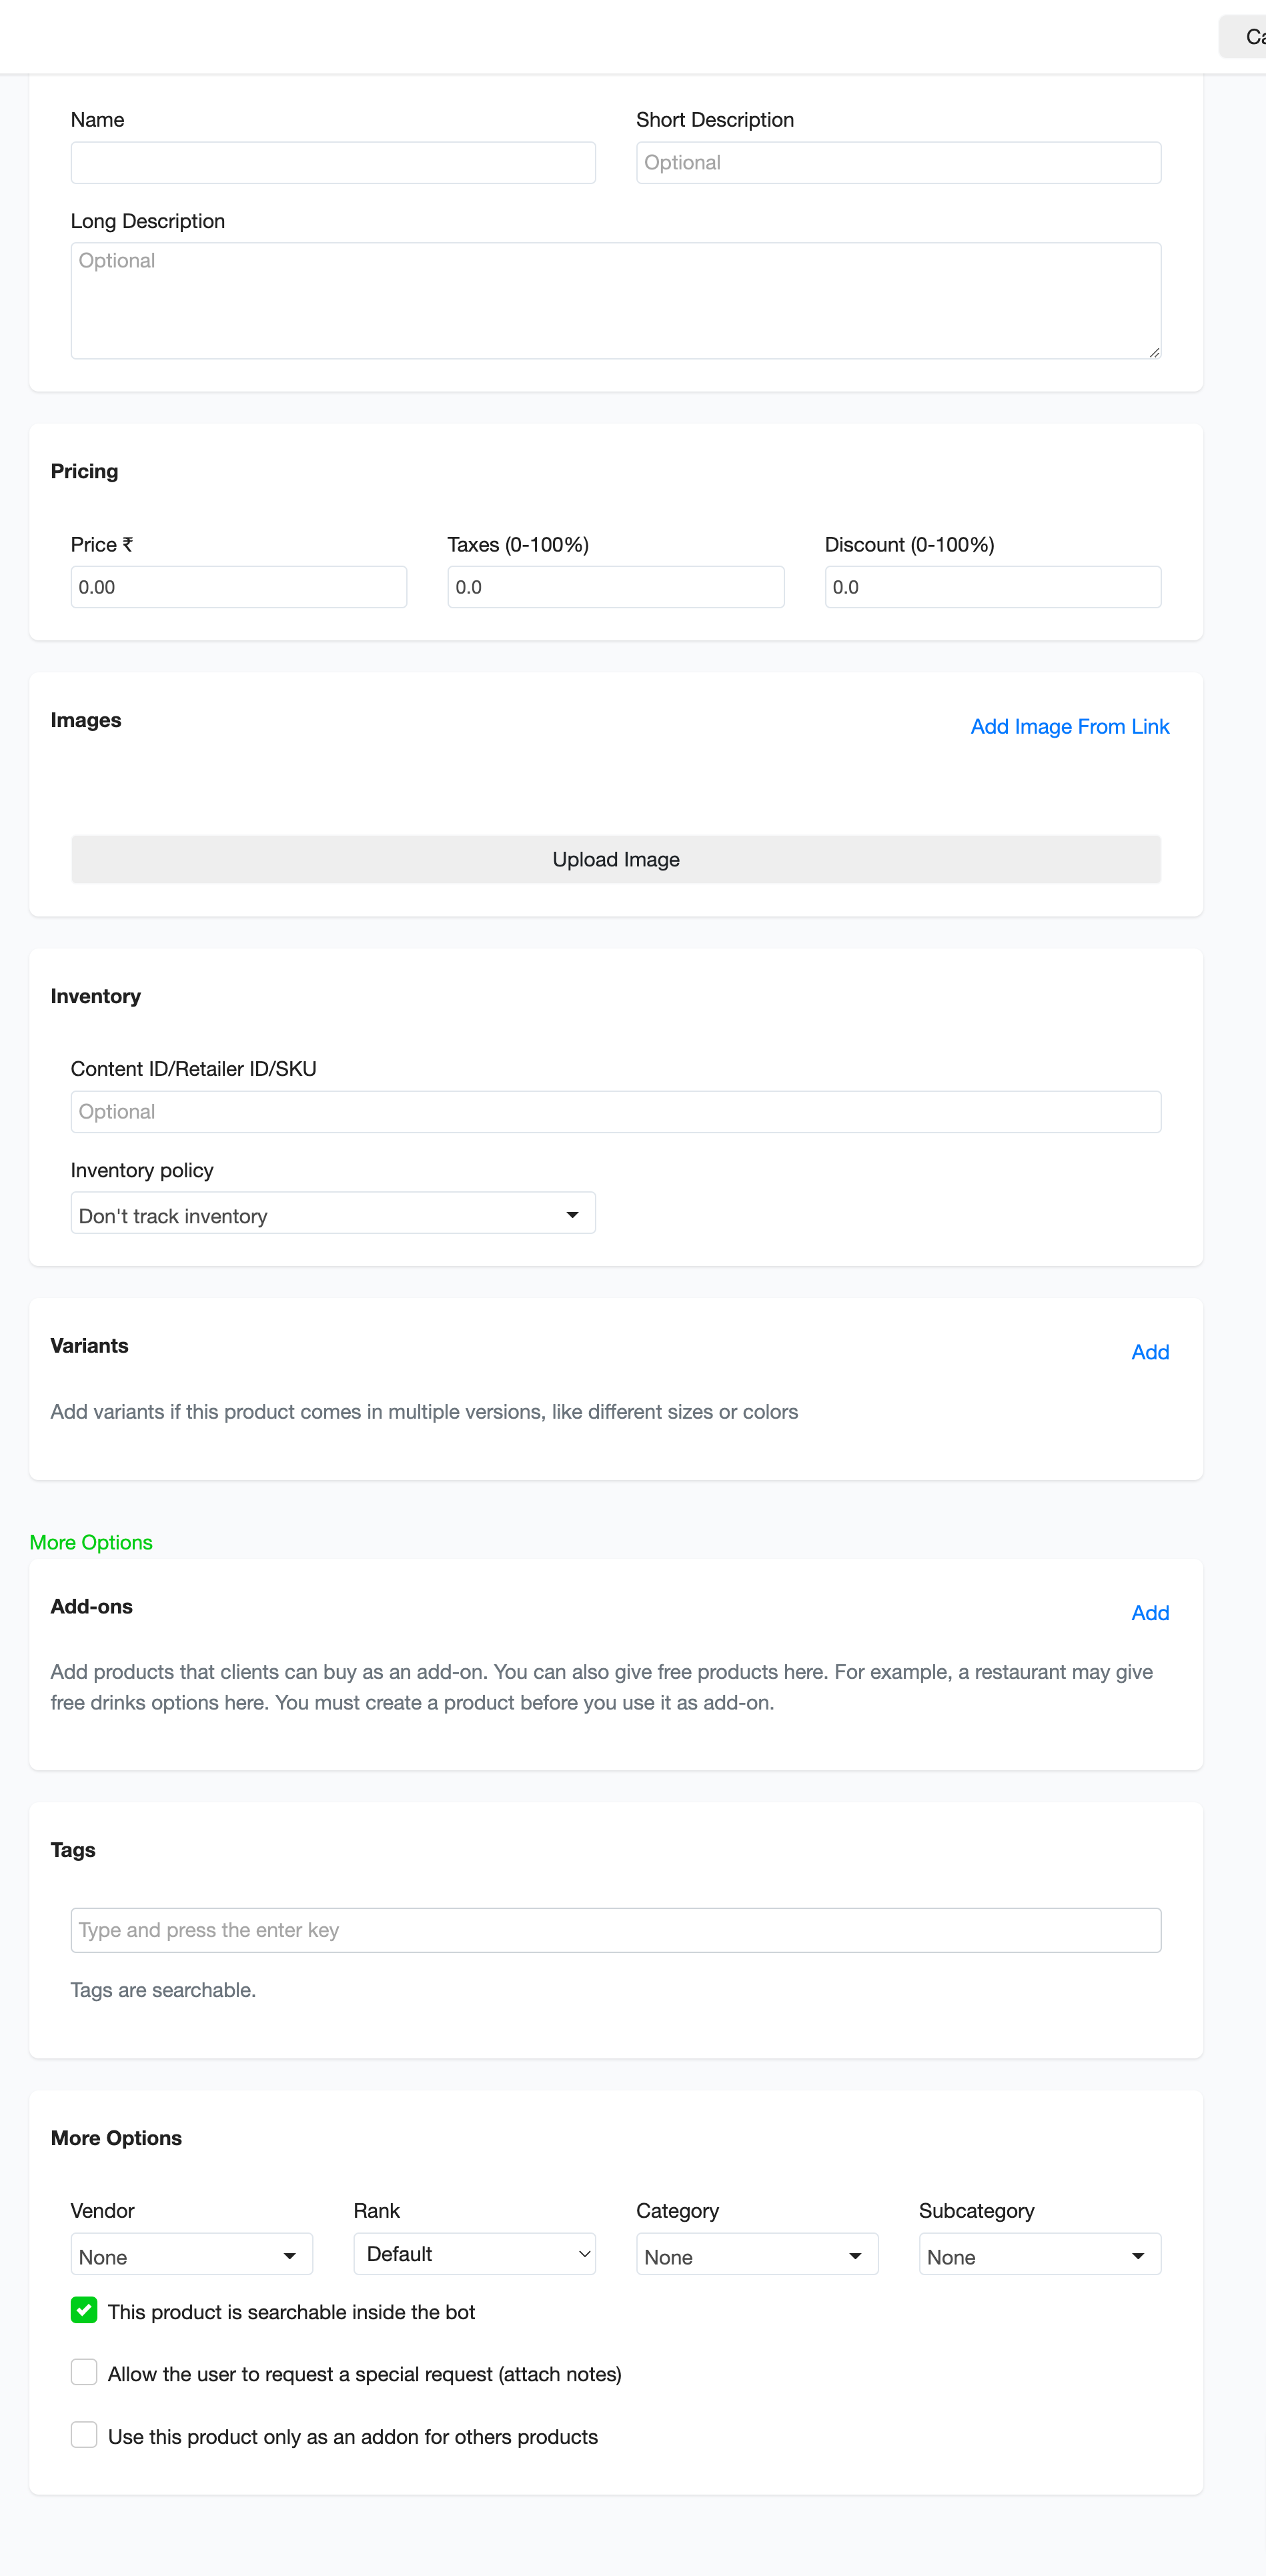
On this product details page, enter the details about the product in the given column respectively.
Name – Enter the name of your product in this field.
Short Description – Explain your product in 2 to 3 lines and let your subscriber know what is the product is about.
Description – You can give a detailed description of your product in this field.
Pricing – The values of the product along with the price, tax details and discount percentage can be filled here. Note: Tax & discount fields are optional fields here.
Images – You have to enter the URL of the product and you can add 11 images for a product.
Inventory Policy – Here you choose any among the two options in the drop-down menu. The options are,
- Don’t Track Inventory – This option is to tell Botosynthesis platform not to track the count of products in the inventory (not recommended).
- Tracks this Product Inventory – This option is to inform Botosynthesis that the platform can track the products count on your inventory. Then your bot will inform the admin when there is a shortage on the inventory (recommended).
Tags – You can add the tag to your products and it will be helpful for you on building chat flow showcasing the products to your subscribers. Note: It is different from variants.
Variants – Add the variants of your product like color, size, quantity, and a lot more based on your need.
Optional details – The columns here are optional and they can be used to provide more details about your product.
That is it. After filling all the required columns, don’t forget to press the save button (on the top-right side).
Hope this article helps you to add products to the inventory on our platform.
If you have any other doubts or queries, visit other articles on the knowledge base or interact with our community or contact our support to get your doubts cleared.


