Knowledge Base
Razorpay is the only payments solution in India that allows businesses to accept, process, and disburse payments with its product suite. It gives you access to all payment modes including credit card, debit card, net banking, UPI, and popular wallets including JioMoney, Mobikwik, Airtel Money, FreeCharge, Ola Money, and PayZapp.
Botosynthesis has a built-in integration with Razorpay that allows your business to accept payments inside your bot.
Follow the below steps to connect Razorpay to Botosynthesis
1 – Generate API Key in Razorpay
1.1 Log into your Razorpay Dashboard with appropriate credentials.
1.2 Select the mode (Test or Live) for which you want to generate the API key.
1.3 Navigate to Settings → API Keys → Generate Key to generate key for the selected mode.
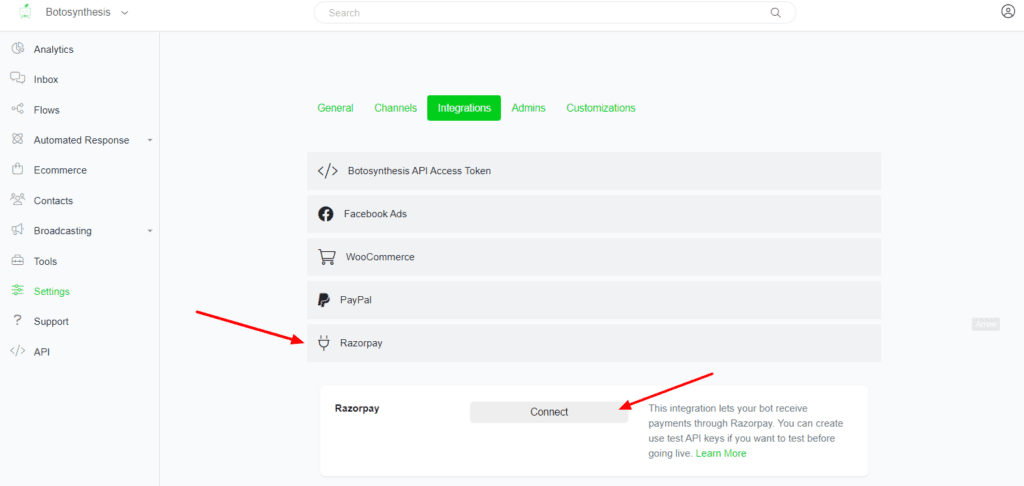
2 – Connect Botosynthesis to Razorpay
Navigate to Settings → Integrations → Razorpay and click connect and use the data generated in step 1.
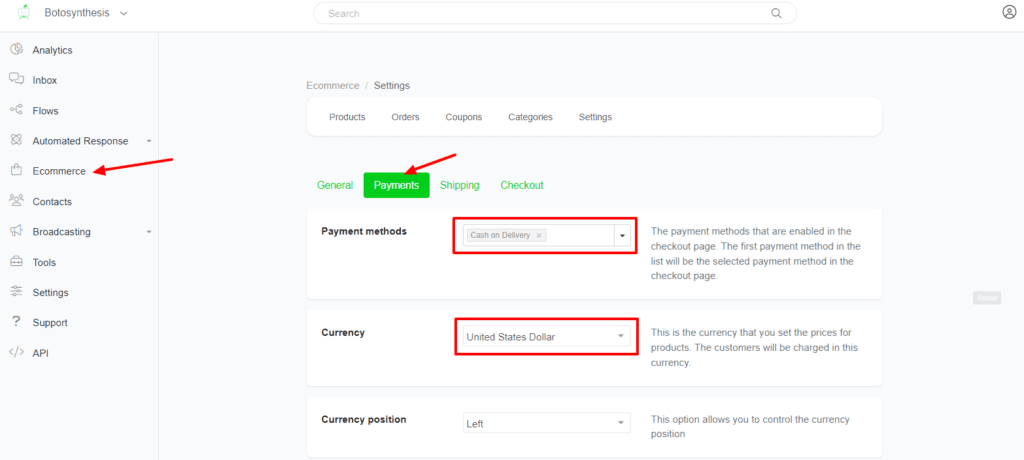
After you connect Razorpay, navigate to Ecommerce → Settings → Payment and enable card in payment methods. Also change to currency to INR.
3 – Set up webbook in Razorpay
3.1 Login to the Razorpay Dashboard and navigate to Settings → Webhooks.
3.2 Click the + Add New Webhook button.
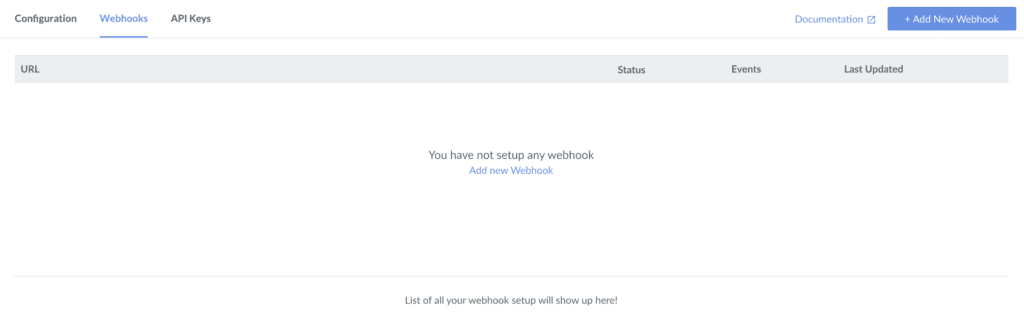
3.3 In the Webhook Setup pop-up page:
Webhook URL: https://app.botosynthesis.ai/webhooks/razorpay.php
Secret: Use your Secret ID generated in step 1
Email: Your email address
Events: payment.authorized
3.4 Click Create Webhook.