Knowledge Base
Google Sheets integration allows you to send data, get data, get a random row, and generate dynamic galleries from Google Sheets.
Connecting Botosynthesis to Google Sheets
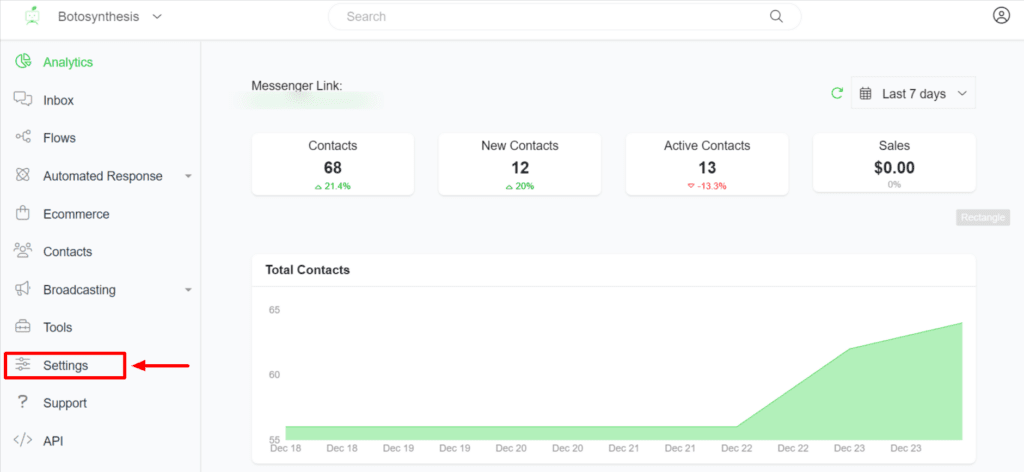
Step 1: Go to Menu >> Settings
Step 2: Go to Settings and Select Integrations on the top menu.

Step 3: Look for the Google Sheets Integration field and click the Connect button
Step 4: From here, you need to choose the account associated with the Google Sheet.
Step 5: Once you connected your Google Sheet, you will get the integration window like this image below.

*Note that you can disconnect the Google sheets with Botosynthesis anytime by pressing the button.
Google Sheet Integration in Action
Now, you will learn how to use the Google Sheets integration.
How to find the Google Sheets actions
To be able to use the Google Sheets integration you need to use this in a flow.
From your menu go to Flows. Once you arrive at the flows overview press the topright button Add Flow.
Once you reach the flow editor you can press the message block that you start with > select Action > Google sheets. Take a look below on how to find the Google sheets integration

What kind of actions does the Google Sheets integration have?
There are several options to choose from when selecting the Google Sheets integration. It all depends on your needs. Below are the options we currently support:
- Send Data to Google Sheets
- Get Row(Value) from Google Sheets
- Update Google Sheet Row
- Clear Row(Value) on Google Sheets
- Get Random Row in Google Sheets
- Create Dynamic Gallery with Google Sheets
Setting up your Google Sheet
Before using any of the above actions you need to create a Google sheet with some preset information.
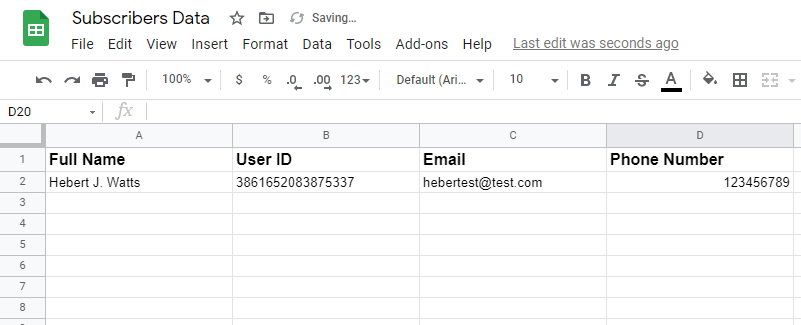
Let’s say you want to capture subscribers’ data like name, email, and phone number. Then export this to a Google Sheet. For this, we need to create a few Headers inside the Google Sheet itself where we can export the data to.
Create a Google sheet-like “Subscriber’s Data”.
Then create the Headers for each Column. We will use Full Name, User ID, Email and Phone number
Now that we prepared the Google Sheet it is time to export the data to this sheet from our Messenger bot.
IMPORTANT FACT!
Whenever you connect your Google Sheet with Botosynthesis you need to take into account that whenever you change the name of the worksheet or spreadsheet you need to redo that Google Sheet action.
The integration is set up to work with the name of the sheet instead of the id. So changing this will cause the integration to stop working.
So if you change either name keep in mind that you need to redo the Google Sheet action inside of your flow builder.
Send Data to Google Sheets
Once you collected all the information we can use the Google sheets action Send Data.
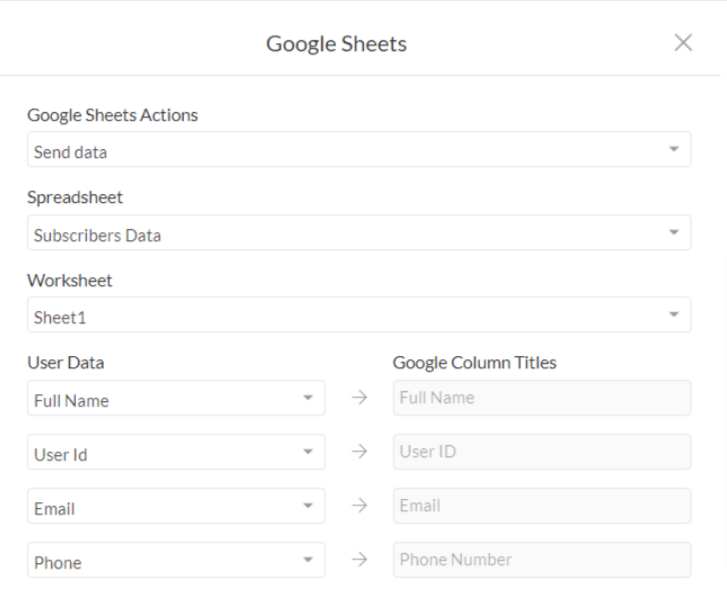
Choose the action (Send data to Google Sheets) and select the name of the spreadsheet that you want to export the data to. The next step is selecting the worksheet.
Now match the Botosynthesis bot data you collected to the Google column titles. You can select any of the custom fields, subscribers data, or bot data. It is all available to you to export.
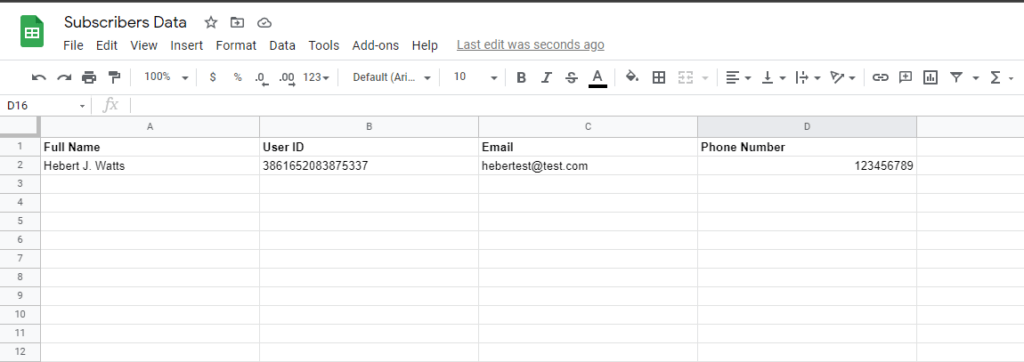
Once the subscriber has gone through your flow and you used the Google Sheet action Send Data at the end of that flow, all the data should nicely have been exported like this
Really easy and simple to do right?
Get Row(Value)
Instead of exporting to data to a Google Sheet we can also do it the other way around. Getting data from a Google sheet and display that information into the Messenger bot for the subscriber to see.
Let’s say your client has a food truck and changes location a few times a week. He wants to be able to give his current location to his customers when they ask for the location. Instead of having to update the bot every single time you can just let your client update his Google sheet instead.
Every time he changes location he just updates that into the Google Sheet and the Messenger bot will fetch the most recent location.
To be able to do this you have to create two botfields. One botfield is used as a lookup value inside the sheet, while the other will store the location of that food truck. In this case, we will create:
- Current Location
- Current Adress
The Current Location botfield will need to have the value that is the same in the likewise named column in your Google Sheet. So in this case we give the value same as the botfield “Current Location“
Once you created this, create your Google sheet with the same titles and fill in the information. It should look like this;
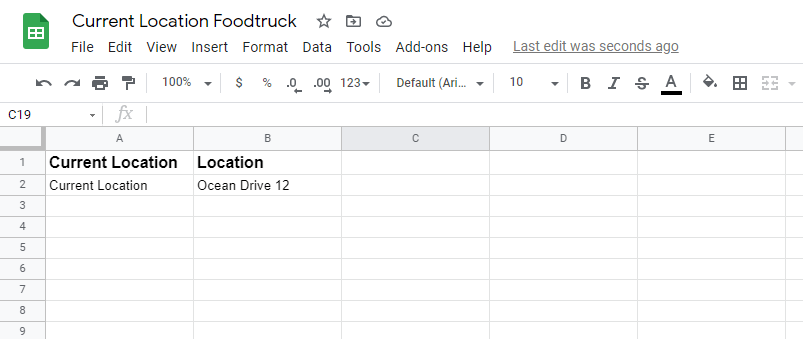
Then all you need to do inside your flow builder is to go to > Google Sheets > Get Row > Select sheet > Select Worksheet > Select lookup column > Map data from sheets to Messenger bot.
The lookup column will be the current location as this value stays constant. So you choose that columns and set the search to must be equal to. Here you insert your botfield Current Location.
Like we do below
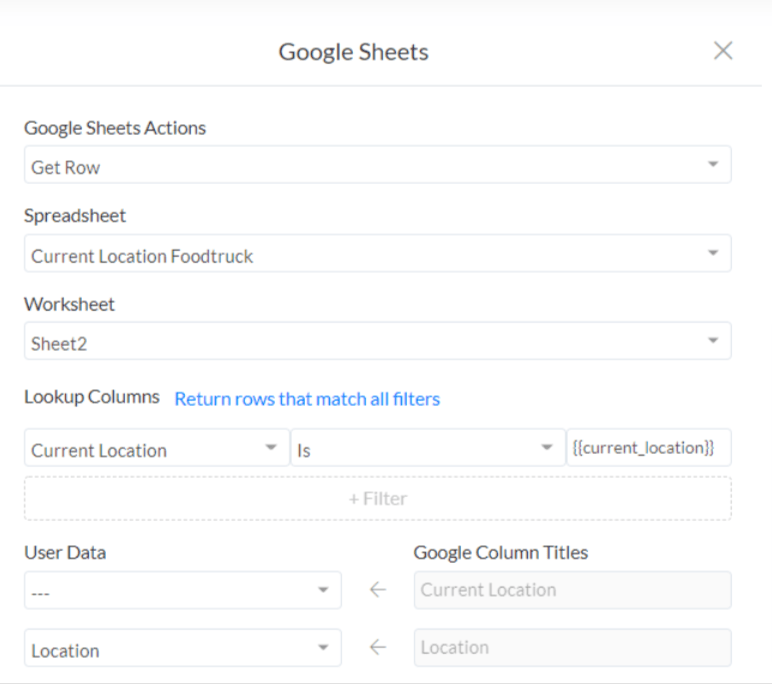
Now your client has the most recent location to his food truck inside the Messenger bot without touching it. The perfect solution!
Getting Random Row
Similar to the getting row data, we can also get a random row presented to us instead. This is great to generate dynamic combinations.
An example could be when creating a Messenger bot to provide boys and girls names for babies.
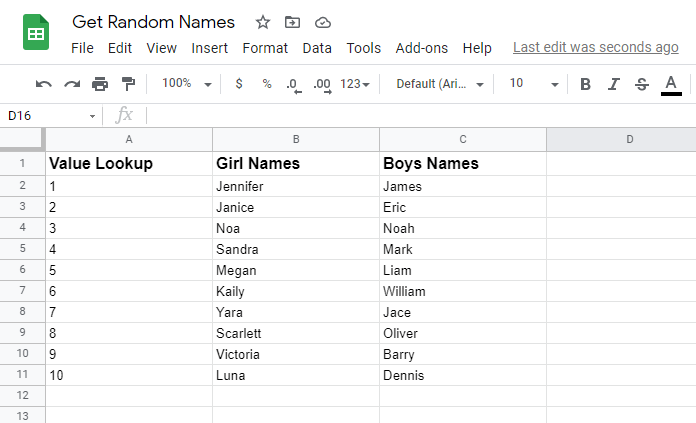
We will have a Google Sheet with 3 columns:
- Value Lookup
- Girl Names
- Boy Names
That looks like this;
So for this to work we will ask a subscriber to choose if they would like to hear a boy’s name or that of a girl. We will use a user input block for this so we can store the value to a custom field. This will allow us to pick a random name from either the boy’s column or that of the girls.
The next step is the determine the lookup value. For this, we will use the column Lookup Value. because we want to generate a random answer/value, we will now need to give it a range to search the sheet for.
That will look something like this;
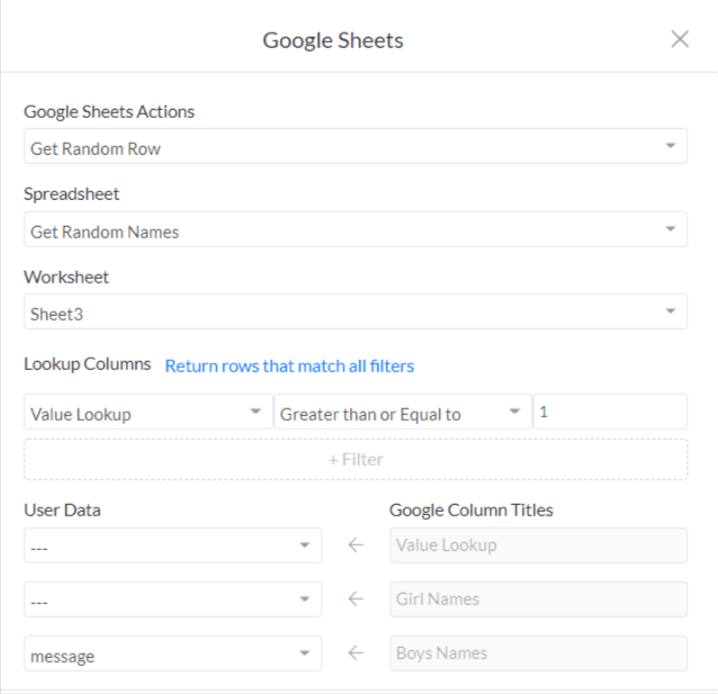
From here the answer is saved to the subscribers custom field and you can display it directly inside of the Messenger conversation.
Update Google Sheets Row
Another great action with the Google Sheets integration is the ability to update a row if you already have values stored. Let’s say you want to provide a subscribers list for your client as an easy way to for him to have a good overview of his subscribers.
So for new subscribers you would have have exported some data like Name, UserId.
Now when they opt-in for a leadmagnet, loyalty program you might want to capture their email and or phone number as well. Instead of creating a new row with this information, you can simply update the one you already have for that subscriber.
So let’s take a look at a subscriber data with basic information
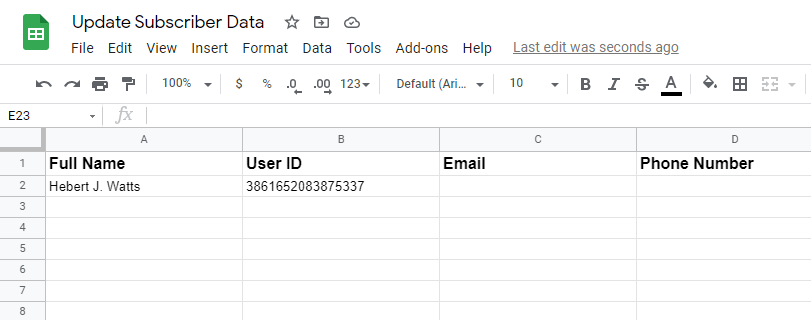
As you can see we currently only have their name and user id. The user id is important as this will be your lookup value when wanting to update the subscriber’s data. This is the column that will never change as the user id is unique to that subscriber.
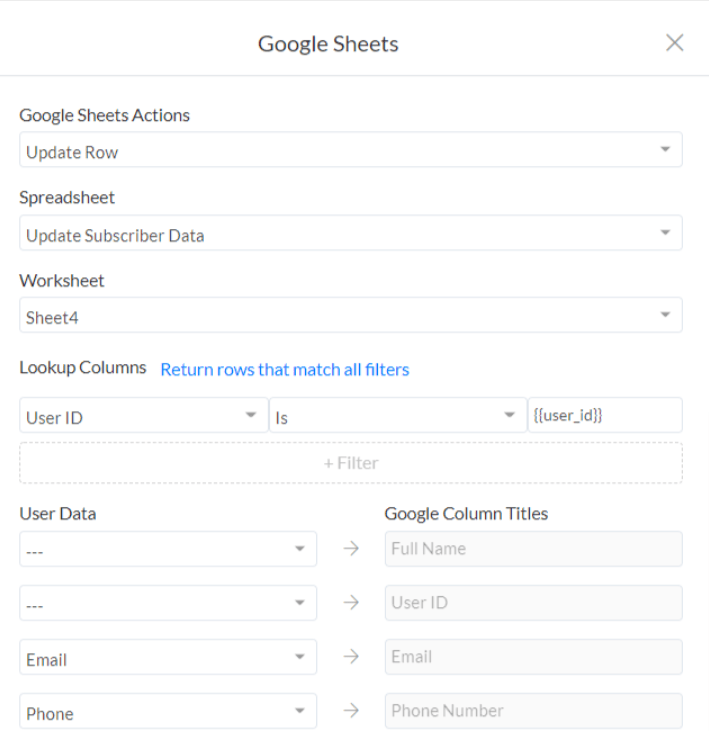
So after you captured the additional subscriber’s data like phone number and email we can select the Google Sheets action Update Row.
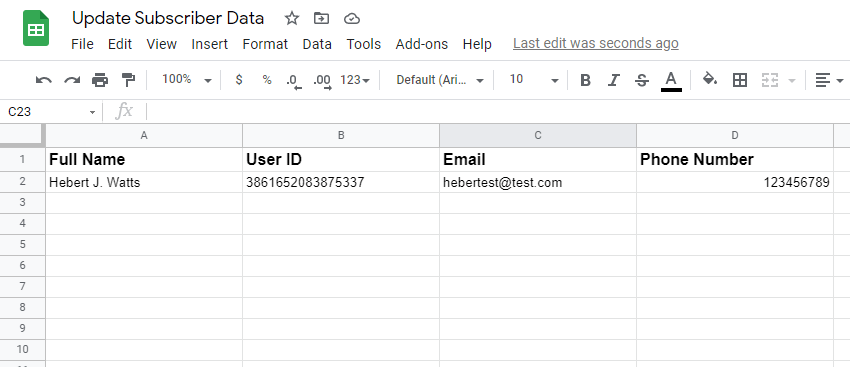
This way you will always have your Google Sheet up to date with the most recent information gathered from your Messenger bot.
It will fill in or update the information that wasn’t there before.
Clear Row On Google Sheet
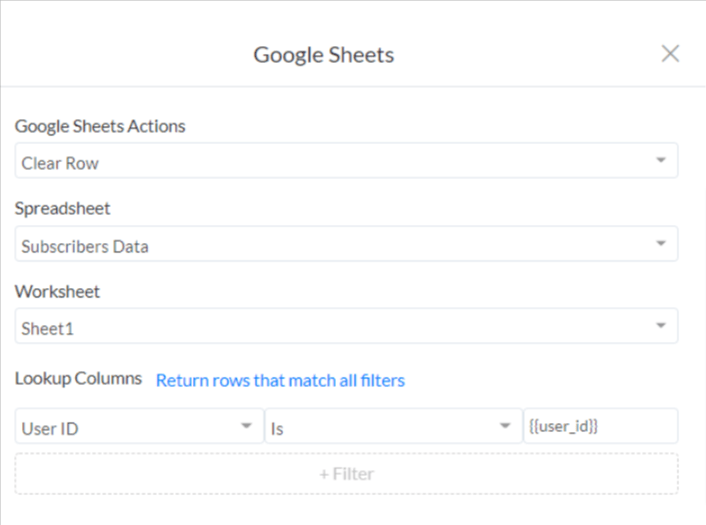
Same as the updating row, we can also clear a row in Google Sheets. It pretty much the same process. For example, if you would like to delete subscribers from your sheet that have unsubscribed from your Messenger bot.
You choose the action Google Sheets -> Clear Row. The same principle applies. You select your spreadsheet and your worksheet. Then choose your Lookup Column. In this case, as mentioned before that will be the user id since this one remains constant.
Create Dynamic Galleries
This feature has been updated and simplified while even providing much more powerful features. You can find the documentation about this special new update here.